
Save Money With DIY: How to Replace an Outdoor Power Vehicle Battery

All vehicle batteries eventually fail, unable to hold a charge over time. If you own a riding lawn mower, a golf cart, or an ATV and the battery is several years old, it’s probably time to learn how to replace an outdoor power vehicle battery. Such batteries don’t last much more than three to five years typically.
When you’re ready to replace an outdoor power vehicle battery, you don’t have to call for help. This is a task you can perform yourself, saving quite a bit of money in the process versus having an in-home service call that can cost $100 or more in labor costs. We’ll show you step by step how to replace a lawn and garden battery.
Before You Replace
If the vehicle makes a clicking noise when you attempt to start it, it’s possible that the battery needs replacing.
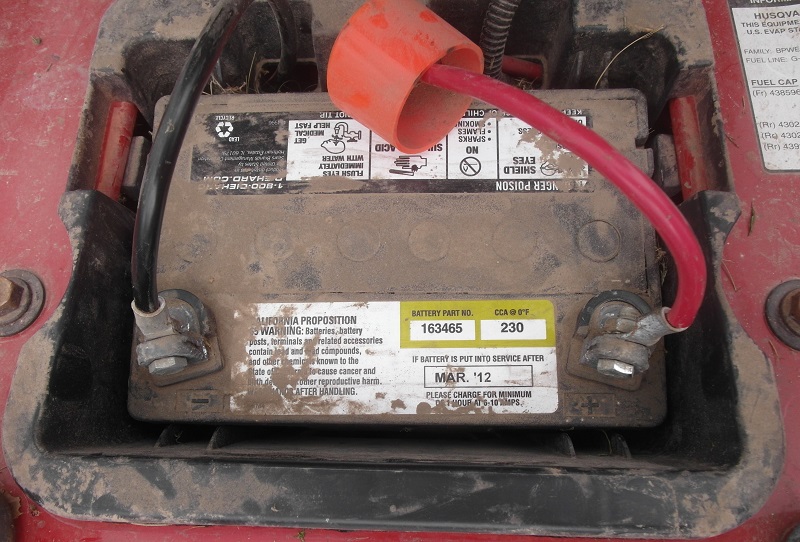
First though, check the condition of the battery. If you’re lucky, the battery will have a date it was created printed on it. As you can see from our photo above, this battery was created in March 2012, so that’s a strong clue that it’s time to replace the five-plus-year-old battery.
Then check the terminals. (These are the metal posts sticking out of the top of the battery.) If you see corrosion on the terminals, which looks like a white, fuzzy substance on and around the terminals, you need to clean them. Leaking acid from the battery causes the corrosion. A 50/50 mixture of baking soda and water applied carefully with an old toothbrush will clean this leaking acid. Use just a little bit of this mixture at first, only adding more as needed.
You must remove the battery cables from the terminals to perform a proper cleaning. We discuss this process further down in this article.
Once you’ve cleaned the terminals, try starting the vehicle again. It may work now.
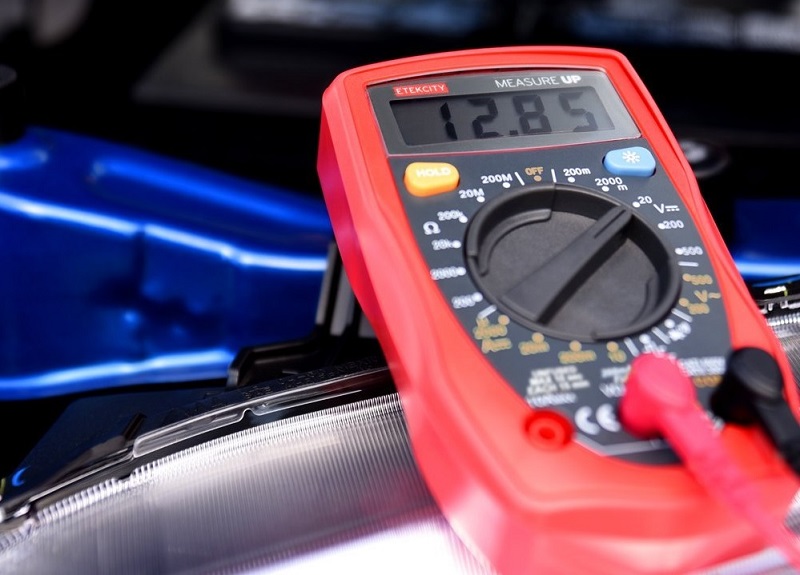
If you don’t see corrosion or if cleaning the corrosion didn’t help, you can determine the battery’s voltage level with a digital multimeter.
If you have a 12-volt battery (which most outdoor power vehicle batteries are), any reading less than 11V or 10.5V indicates a battery that needs charging or replacing.
One of the best battery testing options is the Etekcity MSR-R500, because it’s easy to use with a backlit LCD with large numerals.
If the voltage level is low, you can try charging the battery before replacing it.
Batteries for outdoor power vehicles will lose their charge if they’re left idle for several weeks at a time or subject to cold weather. The more times a battery loses its charge, the faster the chemicals inside the battery break down, eventually rendering the battery useless. So it’s a good idea to charge the riding lawn mower or golf cart battery every month if you aren’t using it to preserve the longevity of the battery.
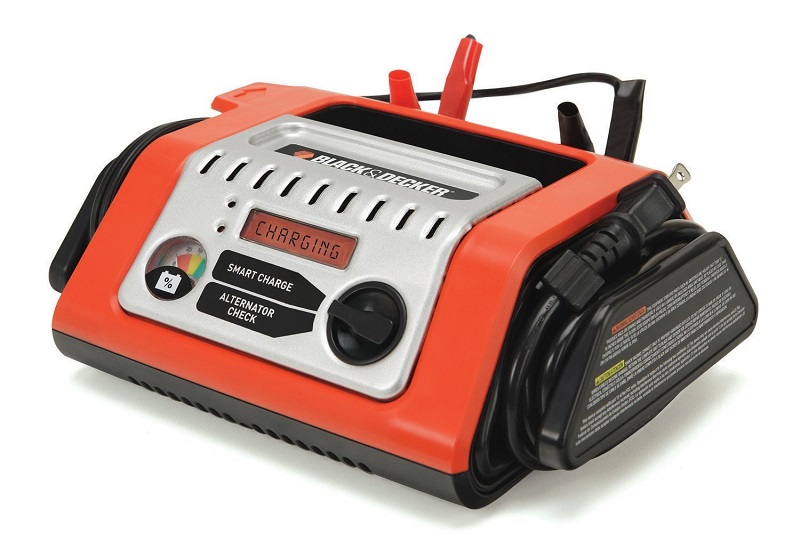
To charge it, you can purchase a portable battery charger that plugs into a wall outlet and converts that power to charge the battery. Such chargers are smaller than the battery itself and easy to move around. One of our favorites is the Black & Decker BCS10B 10 amp charger, because it’s easy to use. Additionally, a 10 amp charger does the job two to six hours faster than a slightly less expensive 2 amp or 5 amp charger.
If the battery still will not hold its voltage after charging, it’s time for a replacement.
Finding the Right Type of Battery
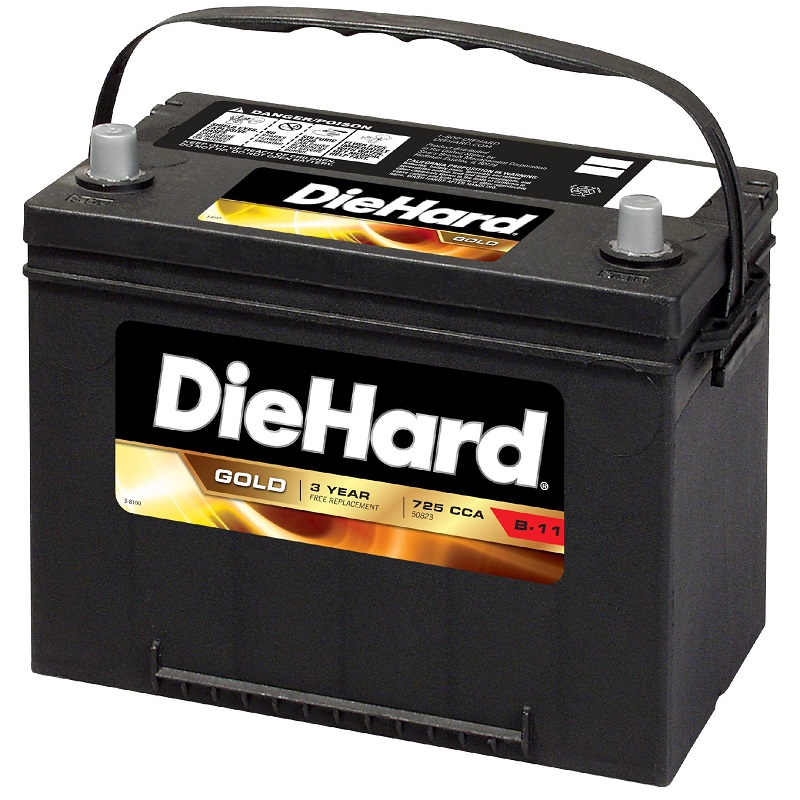
The type of replacement battery you choose will depend on the type of vehicle you have. The replacement battery must match the voltage level of the current battery.
You don’t have to purchase a battery from the manufacturer of your vehicle, although you can. Third party battery makers will offer batteries that are compatible with many outdoor power vehicles, and they typically will save you 15% to 35% from the manufacturer’s brand name cost.
Any third party battery should include a list of outdoor power vehicles with which it’s compatible. Only select a battery that is compatible with your vehicle, or you could cause problems with the vehicle’s operation. Additionally, some replacement batteries designate left or right orientation to allow the battery to line up with the power cables from the motor in the outdoor power vehicle, so pay attention to this.
Replacing the Battery
Once you have the replacement battery in hand, you’re ready to proceed. Tools you’ll need for this job include the following.
- Eye protection
- Gloves
- Old clothing
- Old toothbrush
- Baking soda/water 50/50 mixture
- Stiff bristled brush
- Shop rags
- Pliers or locking pliers
- Socket wrench or another set of pliers
You’ll want eye protection and gloves to protect you from any acid leaking from the old battery. Such acid will put holes in clothing too, so wear old clothes. Even if you can’t see any acid leaking from the battery terminals, it might leak when you move the battery. Keep any acid away from your skin or it will cause burns.
Two cables from the vehicle’s motor should be attached to the battery. Most of the time, the cable attached to the positive terminal is red and a black cable is attached to the negative terminal, just to make things clear and easier for you.
The terminals usually are in one of two shapes. It might be a U-shaped piece of metal with one hole in it that extends out of the top of the battery. Or the terminal is a round post sticking out of the top of the battery. The positive terminal is marked with a plus sign, while the negative terminal will have a minus sign or no sign. The positive terminal also may have a small plastic or vinyl cover that you can lift and slide out of the way.
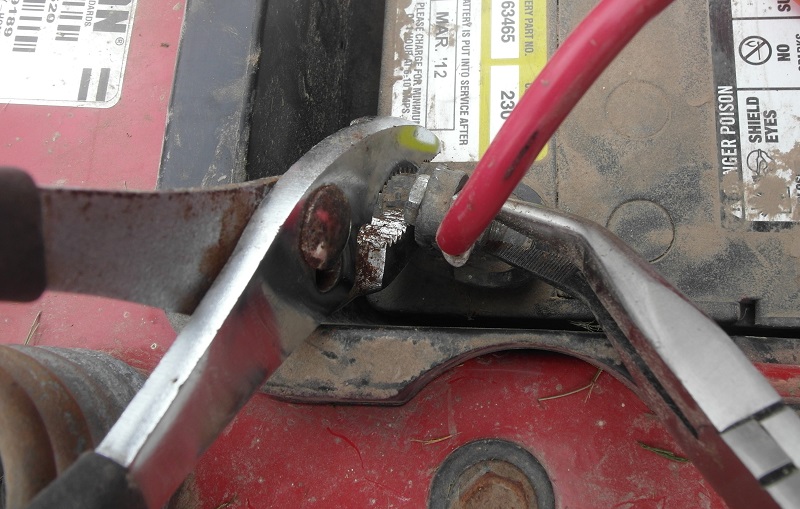
Now remove the battery cables from the terminals. The end of the cables may consist of a bracket or a simple piece of metal. Either way, the metal end of the cable must be touching the battery terminal or the battery will not work. Both types of cables will attach to the battery terminal with a bolt and nut. You’ll have to hold the nut with pliers while turning the bolt with a socket wrench or another set of pliers.
Once the cables are completely removed, set the bolt and nut aside in a safe place, because you’ll need them again. Look for any straps or fasteners that are holding the battery in place and remove them.
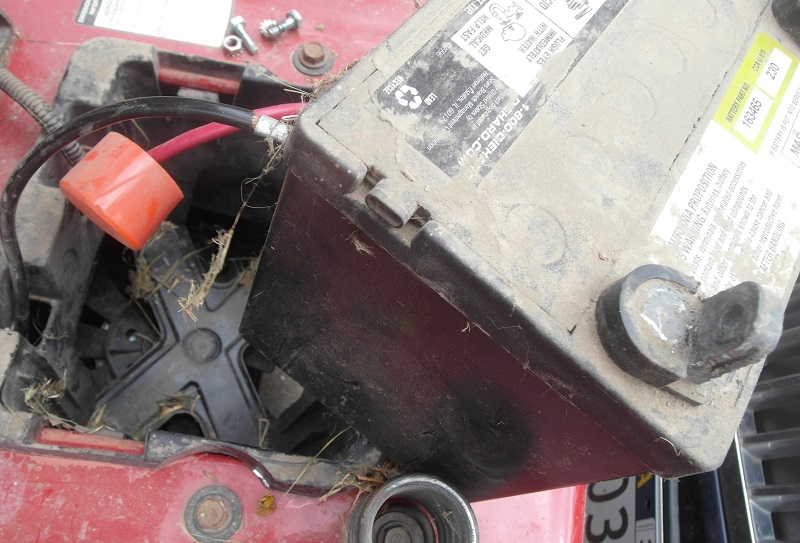
Lift the old battery out of its compartment and set it aside. (It’s heavier than it looks, so you may need help.)
Look at the metal ends of the two cables to ensure they don’t have any corrosion on them. If they are discolored in anyway, clean them with the baking soda/water mix with the old toothbrush we described earlier. If you see rust, clean it with a stiff bristled brush. Dab them dry with a clean shop rag. Clean the nuts and bolts if needed too.
Lower the replacement battery into the compartment. Make sure that the positive terminal on the battery is on the same side as the positive cable from the motor.
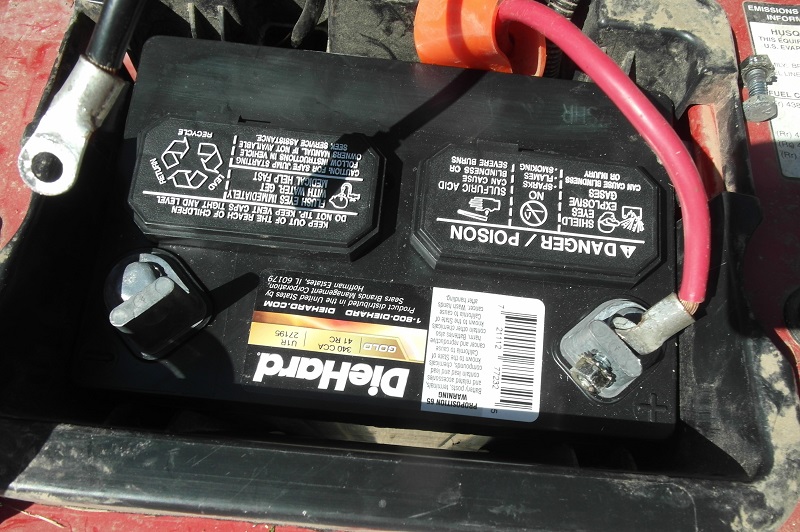
Connect the terminals on the replacement battery to the battery cables, using the nuts and bolts that you removed earlier. Make sure everything is tight and that the metal on the battery cables is clearly touching the metal on the battery terminals.
If you’ve attached everything correctly, the mower should start immediately. If it doesn’t, use your voltage tester to ensure the battery has a full charge. (All batteries you buy for outdoor power vehicles should be sold with a full charge.) If the battery is charged and the vehicle will not start, you likely have another problem with the vehicle.
But this is rare. Most of the time, simply swapping out an old battery for a new one will ensure your riding lawn mower, ATV, or golf cart is up and running again.
Don’t Forget to Recycle

Make sure you take your old battery somewhere to be recycled. In fact, many stores where you buy the replacement battery will charge you an extra fee at the time of purchase that you’ll have returned to you once you bring in the old battery for recycling.
Never dump this old battery into a garbage can to be sent to a landfill. The corrosive components inside these large lawn and garden batteries are poisonous and could contaminate soil and groundwater. Recycling is the only safe option.
Related Posts


-
 20 Creative Ways to Reuse Your Old iPhone
Wondering what to do with your old smartphone when...
- Posted 2 years ago
-
6 Inexpensive Items to Upgrade Your Living Room this Weekend
Nothing like winter-weather-induced cabin fever to get your home...
- Posted 2 years ago
-
Five Best & Five Worst Things to Buy at Kohl’s
Looking for the best deals before your next trip...
- Posted 2 years ago


Hottest Deals on Ben's Bargains
-
 365-Day Price Low Deals Amazon16 hours ago
 -
Up to 75% off Today's Deals Amazon8 hours ago
-
-
-